Introduction to Slicing
Slicing in 3D printing is a pivotal process that bridges the gap between a digital 3D model and a tangible printed object. This step involves using specialized software to divide the 3D model into horizontal layers and generate G-code, the language that 3D printers understand and execute. The precision of this conversion is critical, as it determines the quality, accuracy, and structural integrity of the final print. The slicing software takes into account various parameters such as layer height, print speed, and temperature, optimizing them to ensure the best possible outcome based on the chosen material and printer capabilities.

Beyond merely converting models, slicing software also plays a significant role in customizing and refining prints. It allows users to adjust settings like infill patterns and density, which impact the strength and weight of the object, as well as adding support structures for complex geometries. Advanced slicers offer detailed control over these parameters, enabling fine-tuning to achieve specific goals, whether it's maximizing strength, minimizing print time, or enhancing surface finish. Additionally, the software provides error checking and preview functionalities, ensuring that potential issues are identified and corrected before printing begins, thereby enhancing the reliability and efficiency of the 3D printing process.
One of the most important steps in 3d printing is slicing, to
make a successful print in FDM 3d printing selecting proper
parameters while slicing is most important.
Download
Cura software here.
What is Slicing ?
Slicing is a fundamental process in 3D printing that transforms a digital 3D model into specific instructions for a 3D printer. Using specialized software called a slicer, the 3D model is divided into horizontal layers, each representing a thin cross-section of the object to be printed. The slicer generates G-code, a numerical control programming language that guides the printer's movements, including where to deposit material, the speed of the print head, and the temperatures required. This transformation from a 3D model to G-code is crucial for the accurate and effective construction of the physical object.
Beyond simply dividing the model into layers, slicing software allows users to customize various print settings to optimize the final output. These settings include layer height, infill density and pattern, print speed, and the addition of support structures for overhangs and complex geometries. Advanced slicers also offer tools for error checking and previewing the print, enabling users to identify and fix potential issues before printing starts. This customization and optimization ensure that the printed object meets the desired quality, strength, and functional requirements.
Components of Slicing Software

Slicing software is a comprehensive tool that encompasses several components, each playing a vital role in converting a 3D model into a printable format. Here are the main components of slicing software:
Model Import and Viewing :
- Allows users to import 3D models in various formats (e.g., STL, OBJ, 3MF).
- Provides a 3D viewer to visualize and manipulate the model (rotate, zoom, move, scale).
Layer Slicing :
- Divides the 3D model into horizontal layers based on the specified layer height.
- Generates G-code instructions for each layer, detailing print head movements, extrusion amounts, and other parameters.
Print Settings Configuration :
- Layer Height : Determines the thickness of each printed layer, affecting resolution and print time.
- Infill Density and Pattern : Configures the internal structure of the print for strength and weight optimization.
- Print Speed : Sets the speed at which the print head moves.
- Temperature Settings : Controls the nozzle and bed temperatures for optimal material adhesion and print quality.
- Shell Thickness : Adjusts the number of perimeters or outer walls for added strength and surface finish.
Support Structures Generation :
- Automatically generates support structures for overhangs and complex geometries.
- Allows customization of support density, pattern, and placement to facilitate easy removal post-printing.
Preview and Simulation :
- Offers a layer-by-layer preview of the print, allowing users to inspect the G-code and identify potential issues.
- Simulates the printing process to visualize the build sequence and detect errors before actual printing.
Error Detection and Correction :
- Identifies common issues like non-manifold edges, holes, and intersecting geometries.
- Provides tools to repair these issues within the software or flags them for correction in the modeling software.
Customization and Advanced Features :
- Retraction Settings : Reduces stringing by pulling back filament during non-print movements.
- Cooling Settings : Controls fan speeds to manage cooling rates for different materials.
- Multiple Extruders : Supports settings for dual or multiple extruder setups for multi-material or multi-color prints.
Export and G-code Management :
- Exports the generated G-code to a format compatible with the 3D printer.
- Manages and organizes G-code files for different print jobs.
Slicing Software

- Ultimaker Cura : Ultimaker Cura is renowned for its intuitive interface and extensive customization options, supporting a wide range of 3D printers and materials. It offers features like customizable supports, infill patterns, and optimized print profiles, making it a popular choice among hobbyists and professionals alike.
-
PrusaSlicer : Developed by Prusa Research,
PrusaSlicer is tailored for Prusa 3D printers while also
supporting other printer models. It features advanced
options such as variable layer height, customizable support
structures, and comprehensive print simulation tools,
emphasizing ease of use and print quality.

- Simplify3D : Known for its robust capabilities, Simplify3D supports a wide variety of 3D printers and materials, offering features like multi-material printing, customizable supports, sequential printing for multi-part jobs, and detailed print analysis tools, making it popular among users seeking advanced control and reliability.
- Slic3r : Slic3r is an open-source slicing software known for its flexibility and extensive customization options. It supports multiple operating systems and offers features like infill patterns, support structure generation, and adaptive layer height, providing users with tools to optimize print quality and efficiency.
- Meshmixer : from Autodesk, serves primarily as a mesh editing tool but includes basic slicing capabilities. It features robust support structure generation, mesh repair tools, and model preparation functionalities, suitable for users who require detailed model manipulation and preparation for printing.
-
MatterControl : Developed by MatterHackers,
MatterControl is a comprehensive slicing software and
printer control suite. It offers model editing tools,
customizable print settings, cloud-based library access, and
support for multiple printer models, catering to users
looking for an all-in-one solution for 3D printing
management.
Features of Slicing Software
1.Orientation
The orientation feature in slicing software allows users to position their 3D models optimally on the printer’s build platform. This feature provides tools to rotate, tilt, and align the model in various axes, enabling precise control over how the object will be printed. Proper orientation can significantly impact the quality and success of the print by minimizing overhangs, reducing the need for support structures, and optimizing layer alignment for structural integrity. For example, rotating a model to ensure that large flat surfaces lie parallel to the build plate can improve surface finish and stability during printing. Additionally, orienting the model to align with the printer’s build volume efficiently can help in maximizing the use of space and reducing print time.

Beyond improving print quality and efficiency, the orientation feature also aids in enhancing the functional properties of the printed object. Since 3D printing typically results in anisotropic parts, where the strength and mechanical properties vary depending on the layer direction, the orientation can be adjusted to align with the expected load or stress directions. This strategic alignment ensures that the printed object has optimal strength where it is most needed. Moreover, the orientation feature often includes visualization tools to preview the model's positioning and its implications on the print process, such as the distribution of support structures and potential weak points.
2.Layer Height
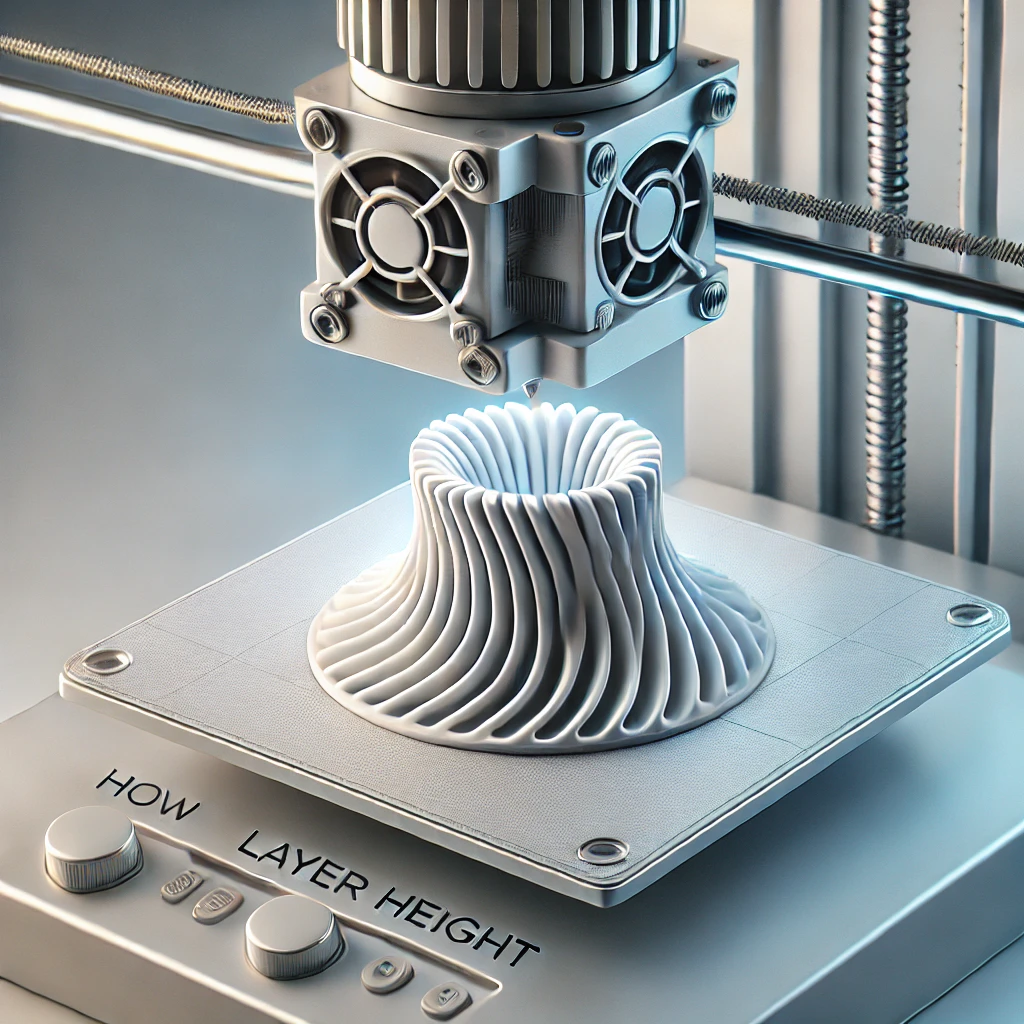
The layer height feature in slicing software is a critical parameter that determines the thickness of each horizontal layer in a 3D print. This setting plays a significant role in defining the print's resolution, surface finish, and overall print time. Thinner layers (lower layer height) result in higher resolution prints with finer details and smoother surfaces, as each layer adds less visible stepping between adjacent layers. This is particularly important for models that require intricate details or a polished appearance. However, printing with a lower layer height increases the total number of layers, thereby extending the print time and potentially increasing the risk of print failures due to the prolonged process.

On the other hand, thicker layers (higher layer height) can significantly reduce print time since fewer layers are needed to complete the model. This setting is advantageous for printing large objects where fine details and surface finish are less critical. Thicker layers also generally improve the mechanical strength of each layer bond, making the printed object more robust in some cases. The layer height feature thus allows users to balance the quality, strength, and efficiency of their prints according to their specific needs and the intended use of the printed object. By adjusting the layer height, users can optimize their 3D printing process for either speed or detail, depending on the requirements of their project.
3.Shell Thickness
The shell thickness feature in slicing software allows users to control the number of perimeter walls or shells that make up the outer layers of a 3D print. These outer walls define the solidity and surface smoothness of the printed object. By adjusting the shell thickness, users can enhance the structural integrity, surface finish, and overall quality of their prints.

Typically, increasing the shell thickness adds more perimeter layers around the print, which strengthens the object and improves its durability. This is particularly beneficial for functional prints or objects that require added stability and rigidity. Additionally, thicker shells can help in achieving a smoother outer surface, reducing the visibility of layer lines and improving the aesthetic appearance of the print. Conversely, reducing the shell thickness decreases the number of perimeter layers, which can save material and reduce print time. However, this may compromise the print's strength and surface finish, particularly for objects that require robustness or a polished appearance. Shell thickness is an essential parameter in optimizing the performance and appearance of 3D printed objects across various applications and industries.
4.Infill
The infill feature in slicing software refers to the internal structure of a 3D printed object, filling the space between its outer shell or perimeters. This feature allows users to adjust the density and pattern of this internal structure, influencing factors such as strength, weight, and print time.
- Density : Infill density determines how much of the interior volume of the object is filled with material. Higher infill densities result in a more solid and robust print, suitable for functional parts that require strength and durability. Lower infill densities reduce material usage and print time, making them ideal for prototypes or objects where weight reduction is a priority.
- Pattern : Slicing software offers various infill patterns (e.g., grid, honeycomb, triangles) that affect both structural integrity and print efficiency. These patterns distribute material evenly and efficiently throughout the object, enhancing its stability without compromising on material consumption or print time.

The infill feature allows users to customize the internal structure of prints, optimizing them for different applications ranging from functional prototypes to artistic models.
5.Support structures

The support structures feature in slicing software is essential for 3D printing models with overhangs, bridges, and complex geometries that would otherwise be difficult or impossible to print without additional support. These structures provide temporary scaffolding during the printing process, preventing deformities or print failures caused by unsupported sections.
- Automatic Generation : Slicing software automatically generates support structures based on the geometry of the model. It identifies areas that require support, such as overhangs or steep angles, and creates podium beneath these areas to ensure proper material deposition and structural integrity during printing.
- Customization Options : Users can customize various aspects of support structures, including density, pattern, and placement. Adjusting these parameters allows for tailored support that balances material usage with ease of removal post-printing.
- Material Compatibility : Support structures are designed to be easily removable after printing. Some slicing software offers features to optimize support removal, such as generating support structures using a different material that dissolves or breaks away more easily than the main print material.
- Preview and Simulation : Before printing, users can preview the placement and configuration of support structures in the slicing software's visualization tools. This allows for adjustments to ensure optimal support without unnecessary material usage or interference with critical features of the model.
Overall, the support structures plays a significant role in enhancing print quality, minimizing print failures, and broadening the range of applications for which 3D printing can be effectively utilized.
6.Rafts, Skirts and Brims
In slicing software, rafts, skirts, and brims are additional features that can be used to optimize the 3D printing process:
Raft:
A raft is a layer of material printed underneath the first layer of the actual model. Its purpose is to improve adhesion to the build plate, particularly useful for prints with a small contact area or for materials prone to warping. Rafts provide a stable base for the model and can be easily removed after printing.
Skirt:
A skirt is a perimeter line or multiple lines printed around the model but not touching it. It helps in priming the extruder and ensuring that filament is flowing smoothly before starting the actual print. Skirts also allow users to check bed leveling and ensure proper initial layer adhesion without affecting the print itself.
Brim:
A brim is similar to a skirt but consists of several concentric outlines printed directly attached to the model’s first layer. Brims help in improving bed adhesion, especially for models with small surface areas or corners prone to lifting. They increase the model’s contact area with the build plate, reducing the chances of warping and improving print stability.
These features are optional but valuable for optimizing print quality and success, especially for challenging prints or when using materials with specific printing requirements. Users can adjust parameters such as the number of raft layers, skirt distance, and brim width within the slicing software to tailor these features to their specific printing needs and preferences.
7.Print Speed
The print speed feature in slicing software allows users to control the speed at which the 3D printer's print head moves during the printing process. This setting directly influences several aspects of the print job, including print quality, print time, and the overall success of the print.
- Quality vs. Speed : Adjusting the print speed can impact the surface finish and detail resolution of the printed object. Slower print speeds typically result in smoother surfaces and finer details because the printer has more time to accurately deposit layers. Conversely, faster print speeds can reduce print time but may sacrifice some detail and surface smoothness.
- Material Compatibility : Print speed settings are also influenced by the type of material being used. Different materials have varying optimal print speeds to achieve the best adhesion, layer bonding, and overall print quality. Slicing software often includes preconfigured settings for popular materials to help users achieve optimal print speeds without compromising print quality.
- Layer Adhesion and Cooling : Print speed affects the adhesion between layers and the cooling time for each layer. Slower speeds can improve layer adhesion by allowing more time for the previous layer to cool and solidify before the next layer is deposited. Proper cooling settings are crucial to prevent overheating and deformation, especially for prints with intricate details or overhangs.
- Optimization and Customization : Advanced slicing software allows users to customize print speed settings based on specific regions of the model or different sections of the print job. This flexibility enables users to prioritize speed or quality where needed, optimizing the printing process for various types of prints and applications.
8.Optimised Print Path

The optimized print path feature in slicing software refers to the algorithmic optimization of the toolpath or movement pattern of the 3D printer's nozzle during the printing process. This feature aims to enhance print quality, efficiency, and overall performance by optimizing how the printer moves and deposits material layer by layer.
- Path Planning : Slicing software uses algorithms to calculate the most efficient path for the print head to follow when depositing material. This optimization minimizes unnecessary travel moves and reduces print time, contributing to faster print speeds without compromising print quality.
- Reduction of Retraction and Stringing : Optimized print paths help minimize retraction and stringing issues by reducing the distance and frequency of non-print moves. This results in cleaner prints with fewer imperfections like stringy filaments between printed features.
- Layer Adhesion and Cooling : The optimized print path also considers factors like layer adhesion and cooling times. By strategically planning the toolpath, the software ensures that each layer adheres well to the previous one and that sufficient cooling time is allowed to prevent overheating and deformation of the printed object.
- Preview and Simulation : Some slicing software provides visualization tools to preview and simulate the optimized print path. This allows users to review how the print head will move during printing, identifying potential issues or areas for improvement before the actual printing process begins.
Overall, the optimized print path feature maximizes the efficiency and quality of 3D prints by optimizing toolpath planning, reducing print time, minimizing material waste, and enhancing the overall reliability of the printing process.
9.Temperature

The temperature feature in slicing software allows users to control and optimize the temperatures of both the extruder nozzle and the heated bed during the 3D printing process. These temperature settings are crucial for ensuring proper material flow, adhesion, and print quality.
- Nozzle Temperature : The nozzle temperature determines the melting point and flow characteristics of the filament material as it is extruded onto the build plate. Different materials require specific nozzle temperatures to achieve optimal layer adhesion, dimensional accuracy, and surface finish. Slicing software provides the flexibility to adjust nozzle temperatures based on the type of filament being used, whether it's PLA, ABS, PETG, or others.
- Heated Bed Temperature : The heated bed temperature plays a critical role in ensuring the initial layer of the print adheres securely to the build surface. For materials prone to warping, such as ABS, a heated bed helps maintain a consistent temperature throughout the print job, minimizing the risk of lifting or curling of the print from the build plate. Like nozzle temperatures, heated bed temperatures can be adjusted within the slicing software to optimize adhesion and print quality.
- Material Profiles : Many slicing software packages include preconfigured temperature profiles for popular filament materials. These profiles simplify the printing process by providing recommended temperature ranges for both the nozzle and heated bed, based on the manufacturer's specifications and user feedback.
- Customization and Optimization : Advanced slicing software allows users to customize temperature settings based on specific print requirements and environmental conditions. Fine-tuning these settings can enhance print quality, minimize print failures, and optimize the overall printing process for different types of prints and materials.
Delve Deeper into understandings of FDM Slicing and SLA Slicing
- FDM Slicing : Fused Deposition Modeling (FDM) slicing involves preparing 3D models for printing by layering thermoplastic filament through a heated nozzle. Slicer software translates designs into instructions like layer height, infill density, and wall thickness. Layer height determines print resolution: thinner layers enhance detail but extend print times. Infill density and wall thickness balance strength and material use. Supports are generated for overhangs, ensuring print stability during construction. FDM slicing offers versatility with various filament options, making it popular for rapid prototyping and functional parts due to its robustness and cost-effectiveness.
- SLA Slicing : Stereolithography (SLA) slicing is crucial for 3D printing using resin-based technology, where UV lasers cure liquid resin layer by layer. Slicer software controls layer thickness to achieve desired resolution and smooth surface finishes. Supports are essential for SLA prints to manage overhangs and maintain print accuracy during resin curing. Post-printing processes involve UV curing to solidify the resin fully and washing with isopropyl alcohol to remove uncured resin. SLA printing excels in producing intricate, high-detail models with smooth surfaces, making it ideal for applications requiring precision, such as jewelry, dental models, and intricate prototypes.
Conclusion
In conclusion, mastering the art of slicing for 3D printing is essential for achieving successful prints regardless of the technology used. Whether employing FDM or SLA slicing techniques, understanding parameters like layer height, infill density, and support structures is crucial. FDM slicing offers versatility and durability, making it suitable for functional prototypes and everyday objects. In contrast, SLA slicing excels in producing intricate, high-resolution models with smooth finishes, ideal for detailed designs and specialized applications. By tailoring slicing settings to the specific requirements of your project and printer, you can optimize print quality, efficiency, and overall success in bringing your designs from digital models to physical reality.
For any further questions about mastering slicing for 3D printing, we invite you to visit our https://iamrapid.com to get more information. Understanding the essential aspects of slicing—such as layer height, infill density, and support structures—is crucial for achieving outstanding print quality and efficiency tailored to your specific needs. Whether your focus is on optimizing for intricate details, functional durability, or cost-effective production, selecting the right slicing settings ensures dependable performance across various 3D printing projects. If you're interested in learning more about our slicing techniques and services, please reach out to us at https://iamrapid.com . Share your design specifications, material preferences, or project requirements, and we'll collaborate to find the best slicing solutions for your applications.
